Showing posts with label kitchen tips. Show all posts

Friday, October 05, 2012

We Conquer the Paupiette

It's been a busy week, what with shows and a visit from my Dad (more on that later), but I didn't want to let too much time pass by without noting that we have at last conquered that !#%!$#! Paupiette of Sea Bass of Le Cirque fame.  

Long-time followers of my blog will note that we have been trying to recreate this damn dish again and  again and again since late 2007, with no success and much cursing of potatoes. 

Well, we had a wonderful friend over for dinner before her move to the wilds of Steamboat Springs, Colorado, and since she's an adventurous soul, we thought we'd give that !#%!$#! Paupiette one more try.

This time I did a lot more due diligence to figure out how exactly that potato wrapping was supposed to happen. I got some more tips from blogs and armed with a Börner V-slicer that makes potato slices so thin you can read through them, we forged ahead.  Here is Daniel Boulud's original recipe, which we adjusted slightly as follows:

Paupiettes of Sea Bass in Merlot Sauce (because using a whole bottle of Barolo wasn't in the budget)

For the Merlot Sauce:
1 tablespoon oil
1/2 cup chopped shallots
1/2 cup sliced white mushroom caps
1 small thyme sprig
1 cup chicken stock or clam juice
1 bottle (750 ml) Barolo or other full-bodied dry red wine
1 tablespoon heavy cream
1 stick (4 ounces) cold unsalted butter, cut into tablespoons
Pinch of sugar
Salt and freshly ground pepper

Heat the oil in a medium saucepan. Add the shallots, mushrooms and thyme and cook over high heat for 10 minutes, stirring frequently. Add the stock and boil until the mushrooms are almost dry. Stir in the wine and boil until reduced to 2 tablespoons, about 30 minutes. Stir in the cream and bring to a boil over low heat. Whisk in the butter and sugar and season with salt and pepper. Strain the sauce through a fine sieve, pressing on the solids, and keep warm.

For the Paupiettes:
Four skinless 4-ounce sea bass fillets
Salt and freshly ground pepper
1 teaspoon chopped thyme, plus 4 small sprigs for garnish
2 very large baking potatoes
5 tablespoons unsalted butter, 1 melted
3 large leeks, white part only, thinly sliced
1 tablespoon minced chives

Trim each of the sea bass fillets into a 5-by-1 1/2-inch rectangle. Season with salt, pepper and the thyme.

Using a knife, slice each potato lengthwise to remove the rounded portions and make a block shape; do not cut off the tips of the potatoes, but do peel them. Using a mandoline, slice the potatoes lengthwise into very thin slices. Brush the slices on both sides with the melted butter and season with salt. This is important, don't rinse the slices or anything, just toss them in butter so they don't turn brown. The butter will also help the slices stick.

For each paupiette, on a 10-inch sheet of wax paper, arrange 8 slightly overlapping potato slices to form a 5-inch wide rectangle. Here's what isn't explicitly said: the slices should be placed with an overlap of at least an inch. So slice #1goes down (with the long side "landscape" orientation in front of you) and slice two is placed in the same orientation next to it, but overlapping about an inch or so. Slice #3 goes above Slice #1, overlapping it slightly, then slice 4 goes next to #3 overlapping an inch or so. This continues for 8 slices of potato. There should be an "interleaving" effect where ends of the slices meet. That is, don't put down a column of 4 slices and THEN try to place another column of four slices beside the first because the ends of the potato won't stick together as well.

Center a fish fillet horizontally in the rectangle and wrap the potatoes over and around the fillet to enclose it completely. Here again, use the "interleaving effect," so rather than just flapping one side of slices together on one side of the fish and flapping the other side over that, fold over one slice on the left side, then one on the right, then one on the left, then one on the right, etc., so that they'll stick better.  If you look carefully at the photo, you'll see what I mean.

Use the wax paper to help seal the potato wrap around the fish; remove the paper. Personally I think you should leave the paper and just wrap up the paupiettes in it. Repeat to form the remaining paupiettes. Cover and refrigerate for up to 2 hours. Refrigerating is key.  They need at least 30 minutes to settle in the right shape.

In a medium skillet, melt 2 tablespoons of the butter over moderate heat. Add the leeks and cook, stirring, until softened, about 15 minutes. Season with salt and pepper and keep warm.

In a large nonstick skillet, melt the remaining 2 tablespoons of butter over moderately high heat. Add the paupiettes and cook until the potatoes are tender and golden, turning once with a large spatula, 8 to 10 minutes per side.

Spoon the leeks onto 4 warmed serving plates and ladle the sauce around them. Set the paupiettes on the leeks and top each one with a thyme sprig. Garnish with the chives and serve.

I have to say, that making this was completely easy, ONCE you figured out how to do it.  But if you didn't know how to do it beforehand, it's such a frustrating dish.

The paupiettes themselves are fantastically tasty -- the crisp potato shell makes a fabulous contrast to the meaty white sea bass inside. And the wine sauce is just heavenly.  Do note that the wine sauce is best when freshly made.  If you're trying to get ahead, make the sauce all the way to the place where you've reduced the wine to about 2 tablespoons of concentrated flavor.  Then store that. when you're ready to serve it, continue with the addition of cream and butter and serve immediately.

Yum.

Wednesday, July 18, 2012

Better Living Through Chemistry

I love cleaning tips, especially the kind that only involve a few easy-to-obtain household items. Apparently baking soda is just the magical all-purpose cleaner, but maybe some of you already knew that.

Here's an awesome little cleaning trick you might not have seen before though: how to remove silver tarnish without rubbing, scrubbing and fruitlesslyQ-tipping into all those nooks and crannies.

What to do: place a large piece of aluminum foil on the bottom of a pot that fits whatever it is you're planning to de-tarnish. Boil a couple of quarts of water -- enough to cover the item--then turn off the heat. Add in a few teaspoons of salt per quart and a quarter cup of baking soda per quart. Then simply submerge the item in the solution and cover. In a few minutes, you can check it and you'll see the tarnish magically disappears.  If there's a lot of tarnish built up it may take a little longer, and reheating the water can help the reaction. Pull the silver piece out of the water with tongs (it will be hot from the water!). Rinse it, then buff it with a soft cloth.

I'm utterly fascinated by how this works.  We spent all last night pulling out silver pieces and putting them in the solution, then pulling them out to ooh and ahh.

So here's what I found about how it works.  The black tarnish that develops on silver is actually silver sulfide, formed when the silver reacts with sulfur compounds in the air. If you're used to using silver polishes, or even toothpaste, which was always my "go-to," you're actually rubbing off the silver sulfide layer, but of course, taking some of the silver along with it.

When you use the aluminum foil and soda solution you're actually converting the silver sulfide back into silver.  This works by creating a reaction in which the sulfur is transferred to the aluminum (the silver item must be in actual contact with the aluminum foil), creating aluminum sulfide.  You may notice a sulphuric smell coming from the pot after the reaction, and if you've de-tarnished a few things, as we did, you'll notice the aluminum foil turns dark and tarnished.

For a dramatic demonstration of the reaction, check out this YouTube video.

Thursday, September 10, 2009

Duck treats

So we've decided that duck confit is just something we need to keep doing on a regular basis...It's ridiculously easy, and, as I mentioned to my Omnivore, it's the gift that keeps on giving.

Here's what we had for dinner the other night after I'd made the duck confit in the slow cooker (6 hours on low). My Omnivore came back from his Sunday afternoon gig and just inhaled when he stepped through the door.

From the pecans (toasted lightly) moving clockwise,
  • a jar of garlic cloves (also slow cooked in the duck fat for six hours)

  • a square jar of duck rillette (confit meat shredded and mixed with some of the duck jello left over from the slow cooking process)
  • a crock of French Onion Soup (onions caramelized for an hour and a half)
  • a little dish of Serra d'Estrella -- an unctuous fabulous sheep cheese from Portugal
  • a small dish of shredded pickled beets (homemade with rice wine vinegar courtesy of Martha Stewart)
  • some duck liver pate (homemade with Armagnac and truffle salt)
  • some chicken liver pate (also homemade with armagnac and truffle salt)
So I used to make a sort of fancy overworked chicken liver pate, a recipe out of Saveur Magazine. But once I had some chicken liver pate made by the chefs at Postrio, and I was told it was just onions, liver, salt and pepper. It was then that I started to understand that it was all about technique. Here's how I make it now.

Chicken (or Duck) Liver Pate
  • 1 lb chicken livers
  • 2 Tbsp olive oil
  • 1/2 cup finely diced onions
  • 6 Tbsp cognac or Armagnac
  • 8 Tbsp butter, softened
  • salt and pepper to taste
  • 1/2 tsp truffle salt
Clean the livers very carefully. Rinse them in cold water and paper towel them dry. Pull off any sinewy parts, blood vessels, anything stringy, even if you have to smush the liver a bit to clean it off. I've learned that this is the key to getting a good texture in the final pate.

Heat the oil in a skillet and saute the onions over a medium heat until they're golden brown. Add the livers and stir, until they're cooked through. Put the livers into a small bowl to cool, and add the cognac to the pan. Ignite to burn off the alcohol, and then cook over medium heat until the liquid evaporates.

Combine the onions and pan juices along with the butter and liver in a bowl and using a stick blender, blend thoroughly until completely smooth and creamy. Add truffle salt (I like to put in as many chunks from the salt as I can fish out) and pepper to taste. Transfer to a small crock or bowl that's nice enough to serve in and refrigerate until it's firm.

YUM.

Sunday, August 02, 2009

The Rat-tat-tat of a Ratatouille Tart

So we've made this tart three times... this week... so I guess we like it.

Since I didn't grow up in the South of France, I don't have that nostalgic relationship with ratatouille -- mainly it seems like a bunch of vegetables to me, and vegetables are not my favorite thing, as my friends will attest. But maybe if all the veggies of my childhood had tasted like this I'd feel differently.

Strictly speaking this isn't a real ratatouille at all -- no eggplant, no tomatoes -- but my Omnivore and I have taken to calling it the Ratatart. I haven't got any clever mnemonics for it like Melissa d'Arabian's EZ POT (Eggplant, Zucchini, Peppers, Onions and Tomatoes) but it's not hard to put together. Incidentally was anyone else relieved that Melissa won out in the Next Food Network Star? I need food tips and she looks like she has them.

Anyhoo, the recipe is based off of one from Cuisine, and although it requires one to make and blind-bake a pastry crust it's pretty straightforward. I suspect you could even get a frozen tart shell or a nice sheet of puff pastry and get similarly yummy results.

The Ratatart

Pastry Crust:
1 1/2 cups AP flour
1 stick of butter
1 tsp salt
1/2 tsp ground black pepper
4-6 Tbsp of water

Filling:
5-8 oz goat cheese
handful of basil, chiffonnaded
1/2 zucchini, sliced thinly
1/2 yellow squash, sliced thinly
1 medium shallot sliced thinly
1 red bell pepper, trimmed, seeded and sliced thinly

1/4 cup olive oil

Preheat the oven to 375F.

For the crust, mix together the flour, salt and pepper, then cut in the butter with a pastry blender (or two knives used scissor fashion) until the butter is reduced to gravel sized pieces. Stirr in ice water a few tablespoons at a time, stirring the dough until it clumps together in a slightly crumbly ball (better dry than too wet). Wrap it in plastic wrap and flatten it down into a disc then refrigerate for 10-15 minutes. Roll out the dough to fit a 9-inch tart pan and press the crust into the pan.

Blind bake the crust for 25 minutes, then remove and allow to cool.

Spread the goat cheese around the bottom of the crust. I like to snip off a corner of the Laura Chenel package and squeeze it out like Cheez Wiz around the bottom of the tart. Makes me feel declasse. Then spread the basil around the bottom of the tart.

About those thinly sliced veggies, I used a Joyce Chen vegetable slicer since I don't have a working mandoline, but knife-cut squash and zucchini would work fine too. We sliced things so thin that two zucchini and two squash have lasted through three tarts and we still have enought for one more.

So start laying the veggies neatly around the outside of the tart: two slices of squash, two slices of zucchini, a slice of shallot and a slice of bell pepper. Continue all the way around the circle and then fill in the center. Salt and pepper the top and then drizzle with olive oil and bake for 25 minutes or until the crust is golden brown.

I was highly disturbed this week by Michael Pollan's article on America's obsession with cooking... on TV. I mean, I spend no mean amount of time with the TV tuned to the Food Network and Top Chef. Nothing pleases me more than to have a Top Chef marathon on Bravo for the whole day. And today I wasted the whole day catching up on The Next Food Network Star. And on any given day I can't really work until I've settled the order of what I'm watching (Good Eats, usually two back-to-back episodes, Cooking with Lidia, Gordon Ramsay's F Word, and if I must settle, then Emeril Live).

Pollan notes that these days the average American spends 27 meager minutes a day on food prep, which generates a self-doubting course of questioning: Am I not cooking enough? I take more time than that, don't I?

"Umm," says my long-suffering Omnivore, who's been forced to sample four different types of homemade sauerkraut, three kinds of homemade pickle, two kinds of homemade mustard and homemade cornichons in the last couple of weeks, "You make our bread from scratch, make our butter from scratch. We make our own potstickers, our own pastry crusts, smoke our own burgers, churn our own ice cream-- we are DEFINITELY spending more than 27 minutes a day on preparing food."

I sank back into the couch, still pursing my lips slightly and took in the finale of The Next Food Network Star.

"When does Melissa's first show air?"

By the way, here's my helpful tip of the day: When making lots of different kinds of experimental pickles and sauerkrauts and such, write the recipe you used for a particular batch of whatnot on an index card and tape it to the jar, so you can remember how you made it. Let me tell you, it can all become a blur after a while.

Sunday, July 19, 2009

In a pickle...kosher dill pickles, cornichons and sauerkraut

I've been off of the blog for a little while -- life's been busy , in a good way--but it's meant that we've been doing an awful lot of eating and cooking that I just haven't yet blogged. Yikes! Catchup time.

I figure I might as well start with our pickling adventures, since pickling and preserving is such a hot topic in these more economically frugal times.

So, I've been toting around a sauerkraut recipe for ages now, and meaning to make it, but it always sort of sounds vaguely complicated. Well, let me tell you, now that I've made some, it takes absolutely no time to start it off. Really. Plus it's cheap to make and if you can wait a few days for fermenting time, you'll be rewarded with the easiest cheap delicious condiment you've ever made.
Homemade Sauerkraut

Unusually for me, I was very cavalier about the amounts I used in making this recipe. But basically you need the following:
  • Green cabbage (a nice tight head, cleaned, and sliced very finely. Save a couple of leaves for covering the sauerkraut later) I used a 5 lb head
  • caraway seeds (I used about a tablespoon here)
  • coarse sea salt (I used about a tablespoon of La Baleine sea salt)
  • Clean crock or jars (after the initial salting and squishing, it all fit in two quart sized jars)
  • time (around a week or so)
Shred or finely chop the cabbage -- this is easier with a food processor to be sure, but can be done by hand, believe me. Leave a couple of large (3-4 inch diameter) leaf pieces to cap the top of the sauerkraut later.

In a large non-reactive bowl, toss the cabbage with sea salt. Use liberal amounts of sea salt -- as usual I went for the notion of the whole thing tasting as salty as the ocean and that seemed to work.

I also vastly underestimated how much cabbage I'd have, so I wound up needing other pots and bowls initially, but after 20 minutes or so, enough water had drained out of the cabbage that I could squish it all down and condense it into one bowl. Don't throw away that brine, transfer the cabbage and water into the same bowl!

I sprinkled it with the caraway seeds until it seemed like it was nicely dotted with seeds (see above pic) and then set it aside for a bit longer, maybe another half hour. After that I squeezed and wrung as much moisture out of the cabbage as I could, (still saving the brine in the bowl, mind you) and packed it into two clean quart-sized Fido jars with the wire-clasp closure. Tamp the sauerkraut down very firmly as tight as you can -- if you're doing this in a big crock, tamp it all down and weight it further down with a heavy plate too.

Add in the brine to cover the sauerkraut, leaving at least an inch of head room at the top of the jar, and cover it with the cabbage leaf and close it up. Do the same with the other jar.

Stand them in a tray or pan in case the jar leak -- I overfilled mine and they leaked quite a bit over the next few days-- and then put them in a cool dark place for a few days. Say, under the sink or in the closet. You may notice that they'll not only leak out liquid, but also some foam off the sides. Don't worry, it just lets you know that fermentation is working. Do be careful though, as you open the jars, mine sprayed out a bit as I unclasped it from the pressure buildup.

After a few days taste test the sauerkraut and see if you like it -- if you want it more sauer, let it ferment a bit longer. When it's to your liking, you can just close up the jar and put it in the fridge, or you can can it to preserve it for later, perhaps an Oktoberfest.

I bought a box of half pint Ball canning jars in case I liked the sauerkraut and/or thought it might be a useful item to trade someone for other food items, perhaps some fresh eggs, or such.

To can the sauerkraut you can follow the instructions on the bottom of the Ball packaging, to which I will add that not only should you heat the jars and lids to sterilize, but also heat up the sauerkraut. If the kraut seems a bit dry, you can add in clean plain water to moisten it up again.

Pack the kraut in the jars and add water if you need too, leaving at least 1/2 an inch of headroom. Wipe the rims and center the lid on top, screw down the band, and then process them for however long the instructions advise it takes in your pressure canner or in boiling water -- it's different for different altitudes. Let them stand in the hot water for five minutes and then take them out and stand them up on a towel in a tray (in case there's breakage). I always find it satisfying to listen for the little metallic pops as the jars cool and the lids suck downward, indicating a good seal.

They tell me that sauerkraut is often made in big batches. The amounts above seemed like a lot to me-- it was a 5 lb cabbage and about a tablespoon of caraway seeds with about two tablespoons of sea salt. But I gather "big" is relative, as other sauerkraut makers talk about making it 75 pounds at a time. And at the Webber Ranch last night, our host pointed me to a ceramic crock that could fit a small child and was marked "30" as in 30 gallons. That was their sauerkraut crock. Well, I was happy with 5 pints of sauerkraut. I know how to make more after all....

=====================
Flush with the success of the sauerkraut -- and while it was still quietly foaming and fermenting in my closet-- I turned my attention to pickles.

For many of us crazy food-obsessive New Yorkers, pickles mean only really one place, Guss' Kosher pickles, right out of the barrels in front of 85 Orchard Street (helpful hint: if you're there and they're open, buy a lot, because God only knows when the next time will be when you see them open again.)

If you are sadly, hundreds of miles away from pickledom, though, you might turn your thought to making your own kosher dill pickles, which is in fact what I did.

Kosher Dill Pickles

Basing off of the Arthur Schwartz recipe which David Lebovitz so kindly linked, I made the following adjusted recipe, which worked well for the baker's dozen of Persian cucumbers I found at our local market. There are better cukes out there for pickling, and I'd like to try the Kirbys or lemon cucumbers, but unfortunately this is what I had on hand.

12-14 short pickling cucumbers
2 quarts water
3 tablespoons coarse white salt (kosher, if available)
4 cloves garlic, unpeeled and lightly-crushed
2 tsp whole coriander seed
1 tsp whole fennel seed
1/2 tsp whole allspice berries
2 bay leaves
4 sprigs of dill, preferably going to seed, washed

1. In a large pot, heat 1 quart of water with the salt until the salt is dissolved. Add the remaining water.

2. Prepare a quart widemouth jar or a couple of pint jars by running them through the dishwasher or filling them with boiling water, then dumping it out.

3. Pack the cucumbers vertically into the jars, making sure they're tightly-packed. As you fill the jars, divide the garlic, spices, bay leaves, and dill amongst them.

4. Fill the jars with brine so that the cucumbers are completely covered. Cover the jars with cheesecloth, secured with rubber bands, or loosely with the lids. Store in a cool, dark place for 3 days. A white slimy scum developed at the top of my brine, which I scooped off.

5. After 3 days, taste one. The pickles can ferment from 3 to 6 days. The longer the fermentation, the more sour they'll become. Once the pickles are to your liking, refrigerate them. I'm still souring my pickles as we speak.

=========================
Cornichons

I have always wanted to make cornichons because I LOVE LOVE LOVE them, with a bit of pate and cheese or salumi. Mmmmmm, perfect lunching materials. Unfortunately I had no idea where to get the minis to make cornichons.

While we were at the Webber Ranch in Petaluma, our hostess Elisa, set out some cornichons along with a fab cheese board. "Homemade" she said while describing the whole board. My ears pricked up.

"Where can you get the cornichons?" I asked Kathleen, Mme. Baker.

"Oh we grow them. We have them in the garden -- in fact you have to keep picking them before they get too big. You want to see?"

Within about fifteen minutes, I have a little over a dozen cornichons in my hot little hands, including a couple of overgrown fellas which I plan to pickle in the same way as I did the dill pickles above. You can order the seeds for the Cornichon de Bourbonne, the preferred cornichon (also called gherkin) for pickling, from Scheepers.

Elisa was kind enough to share her recipe for cornichons:
  • Small cornichons, freshly picked
  • Tarragon
  • sliced shallots
  • whole peppercorns
  • whole dried red peppers
  • bay leaves
  • white wine vinegar
As with much of my pickling experience to date, I haven't been good about amounts or measurements. I had only picked about a dozen cornichon-sized babies, so it all fit into one half-pint Ball jar. therefore I layered them in the jar with only a few slices of shallot, one sprig of tarragon, about a dozen peppercorns, 1 dried red pepper and a bay leaf. Then I just heated up enough white wine vinegar (about a cup) to cover everything, poured it over the whole lot, and put on the lid and screwed on the band (not too tightly) and let it cool, which sealed it without processing. I don't intend to keep it for long, so we just put it in the fridge and plan to eat them oh, probably in the next week or so.
=================
Final note, so in the process of hunting down my ingredients, I noticed that the corn I had gotten from a local bodega (intending to use much later in a posole,) looked mighty suspicious. I could see even through the tupperware sides that it seemed to be very powdery looking, so I hailed it out and took a look. Indeed, it was not just powdery but full of HOLES. Ew. Ew. EW! Like Swiss cheese, i.e. as if it had been eaten...by something....

With the corners of my mouth drooping ever more downward I looked closer and saw movement.

EW EW EW!!! Unwelcome visitors.
I have tentatively identified it as a granary weevil and am now putting bay leaves in every damn thing I lay my hands on.

Ew.

And ew.

Monday, May 18, 2009

Picnic essentials

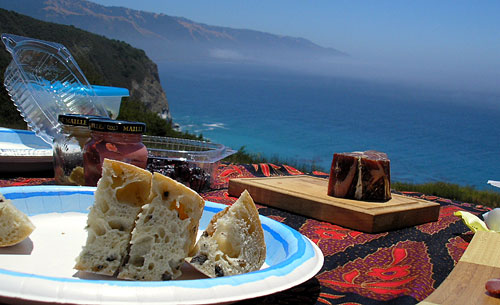
Longtime readers of this blog know that I'm a FAN of the picnic. I LOVE picnics... So I was happy to do a Check It Off article for the San Francisco Chronicle's Home and Garden section last Sunday centered on ideas for a perfect picnic.
A good picnic basket: There are lots of cute baskets out there, but for sheer practical sturdiness, Reisenthel's market basket holds everything from plates and cups to a whole roasted chicken. And when you're not picnicking, use it for shopping at the farmer's market. $40 at Sur la Table, surlatable.com.

Tablecloth: It's not only a civilized addition to a picnic, it can also be a practical one, helping to cover a dusty table and keep splinters at bay. Fabric shops like San Francisco's Satin Moon (32 Clement St., 668-1623) often have lengths of inexpensive remnant fabrics that can easily double as a cheerful table covering.

Silverware: Any outing feels more genteel if you pack silverware instead of plastic sporks. Same goes for glasses and plates.

Wire-bale canning jars: With a wire clamp that firmly closes the top, canning jars are good reusable containers for relishes and condiments or even sides like macaroni salad or cold soup. The wide-mouth makes it easy to spoon the contents out and the rubber ring helps keep the jar from leaking. $3-$6 at Sur la Table, surlatable.com.

Read the rest at the SF Chronicle site.

Of course, poll ten people and you're likely to get ten different ideas of what is essential to a perfect picnic. I tried definitely to focus less on food items, because that kind of stuff falls more under the Food & Wine heading, plus I think the Chronicle has already had lots of great features with yummy recipe ideas in the past.

I thought it was interesting, though, that there were a few comments about the idea of the glass jars. Readers objected to hauling around heavy glassware-- why not use those disposable plastic containers from Ziploc or the Glad Family of Products? After all, they're lighter, reusable and recyclable.

I've used them for a long time myself, because, let's face it, they're cheap, and if you leave them behind by accident, you don't really care. I've even saved the plastic containers that Chinese or Indian takeout food comes in, and reused them because those pint and quart containers are a great convenient size. But when I started this piece (and an upcoming one on storing pantry items), I read a lot more about storing foods in plastic and even though the FDA has approved the use of Bisphenol A or BPA in food grade plastics, there's a body of evidence to suggest that it leaches out of plastics (especially when heated) in unhealthy levels.

If you're like me-- I read about something like High Fructose Corn Syrup and I go rampaging through the house looking for everything with HFCS in it-- you'll head for your cabinet and start flipping over your plastic containers to find out what number plastics are used in the Glad Family of Products. On the bottom of any piece of plastic is a little triangle with the Resin ID number printed on it, telling you what category of plastic you're holding. BPA is commonly found in #3 (PVC), #7 (a variety but notably polycarbonate or Lexan) plastics.

"Well, phew!" you say, after checking your Glad Product, "It's #5 (Polypropylene) and not made with BPAs. Dodged that bullet. I guess we're okay!"

Not so fast. Now it comes out that #5--which you find in everything from Rubbermaid to long underwear--may be leaching other kinds of chemicals, called quaternary ammonium biocides and oleamide, in high enough levels that a research team in Canada had to stop a drug experiment because the chemicals in their containers were contaminating the results. Oleamides are found normally in sleep-deprived animals (including humans) and is thought to help induce sleep.

As a side note, #6 plastic (polystyrene or styrofoam) I try to avoid on the grounds that most recyclers won't take it, and it's not biodegradable -- I envision large flotillas made up of my styro coffee cups choking off a whale and I have fits.

That leaves you pretty much with #1 or #2 or #4 plastics, but now I'm exhausted with the effort of figuring out what plastics are okay and which are not. I'd rather just have some nice glass jars or a Corningware baker with silicone cover.

So we have a nice little oval Corningware gratin that I've been forcing My Omnivore to use for his lunches-- I pointed out that he could either microwave or use it in a toaster over which you can't do with a Glad Family Product--and that's ben just perfect for our purposes. And yes, I'm slowly ditching all the plastic we have and replacing it with Corningware bakers-- I'm a sucker for that "Oven to Table" bit-- and Pyrex storage sets.

Saturday, April 11, 2009

Check It Off: Kitchen reusables

My article yesterday in the Home and Garden section. I love my reusables...

Sure those throwaway items in the kitchen - coffee filters, paper towels, napkins - are convenient, but eventually the cost of all that use-and-toss stuff starts adding up, and then there's the guilt from adding to landfills. Instead of using disposables, why not invest in reusables and save in the long run? Here are some ideas.
Read more at Check It Off: Kitchen reusables.


Monday, March 16, 2009

Why you must sift flour

Okay, so I kinda forgot, I got lazy, I hadn't been sifting my flour for all recipes.

Last night I was scooping out flour for a pastry crust and happened to notice something sort of longish and dangly go by as I scooped.

So I dumped the flour out onto a flat surface and started gingerly picking through it with a fork.

"Whatcha doing?" asked my Omnivore brightly, peering over my shoulder.

"Looking...." I replied slowly, raking through the flour like a CSI.

"Looking for what?" he said a little more warily.

"For something..." I replied, still prodding the flour.

"For what," he said with more low-toned urgency. "You're freaking me out now the way you're looking at that. Is this another 'Hail, J' moment?"

"Maybe..." I said.

I didn't see anything, so I put the flour into a sieve and started to sift though... I just wanted to be sure, and there... at the bottom of my mesh was a one-inch long wormy thing.

"Okay," I said very calmly. "I'm really quite bummed out by this."

"EWWWWWWW...." was my Omnivore's response.

Moral of this story? Put bay leaves in your flour storage container, and always, ALWAYS sift.

Was it the Indian Meal Worm (pictured above)? I dunno. I threw it, um.... AWAY.

Friday, February 06, 2009

Dumping the Refrigerator for a Greener Planet - NYTimes.com

Wow... now that is hard-core. On the other hand, our refrigerator, which is rated as "No Help to the Environment...At All," is small anyhow. should we change over to a mini-fridge and a cooler?

FOR the last two years, Rachel Muston, a 32-year-old information-technology worker for the Canadian government in Ottawa, has been taking steps to reduce her carbon footprint — composting, line-drying clothes, installing an efficient furnace in her three-story house downtown.

About a year ago, though, she decided to “go big” in her effort to be more environmentally responsible, she said. After mulling the idea over for several weeks, she and her husband, Scott Young, did something many would find unthinkable: they unplugged their refrigerator. For good.
More on the NYTimes.com.

Saturday, July 26, 2008

Coolest Thing I Learned Today: Mason Jar Blender

I tend to avoid using my Osterizer blender, which I've had since graduating from college. It's old, it's hard to clean, and there is just no counter space for such a thing, so it lives in the far reaches of a high cabinet. In fact, I almost got rid of the behemoth when my Omnivore bought me my fab Braun stick blender, which mounts quietly on the wall and is simplicity itself to clean and use. I'm something of a packrat however, and I'm not so quick to the task getting rid of stuff. So although the blender parts sat in a "to be donated" pile for about a year, they soon migrated to a "might be useful" pile a year later, and from thence to a "well, it's the back of a high cabinet anyway" spot.

Well, it's apparently Divine Providence that kept our blender from the Goodwill truck, because just a little while ago, I ran across this amazing piece of information on Simply Recipes. The business end of a blender (i.e the blades and the collar, which unscrews from the container for easy cleaning), can also be screwed onto a standard mason jar. Flip it over, and slide it onto the base as usual, and you can blend and chop away inside a mason jar, then pull it off, flip it back over and unscrew. Put its regular lid back on and you are now ready to store.

Are you kidding me? Where has this tip been all my life? No, really--why has no one EVER told me this? According to Elise, blenders used to SHIP with mason jars, so you could use them together. They've ALWAYS been this way!

We just made a glaze for our Slathered Lime Ribs-- lots of garlic, ginger, cilantro, soy sauce, rice wine vinegar, hoisin, ketchup, etc.-- all went into the jar. Popped on blender blades and collar, onto the base-- Vvvrrrp, vvvrrrrrppp, vvvrrrpp, and Voila! Instant sauce, no muss, no fuss. I'm flabbergasted at how brilliantly easy it all is.

The Atlas jars that Classico tomato sauce comes in-- and which I use to store beans and rice and such in our pullout pantry--are exactly perfect for this trick. Homemade peanut butter here we come!

Come on, people-- I know there are more of these sorts of fantabulous tips out there. Don't be holding out--share your tips with us!